
This lesson is made with PSPX9
But is good with other versions.
© by SvC-Design

Materialen DownloadHere
******************************************************************
Materials:
boule-nkt.png
branches-nkt.png
enfant_nkt.png
fond1.jpg
fond2.jpg
fond3.jpg
paysage-nkt.png
******************************************************************
Plugin:
None
******************************************************************
color palette
:

******************************************************************
methode
When using other tubes and colors, the mixing mode and / or layer coverage may differ
******************************************************************
General Preparations:
First install your filters for your PSP!
Masks: Save to your mask folder in PSP, unless noted otherwise
Texture & Pattern: Save to your Texture Folder in PSP
Selections: Save to your folder Selections in PSP
Open your tubes in PSP
******************************************************************
We will start - Have fun!
Remember to save your work on a regular basis
******************************************************************
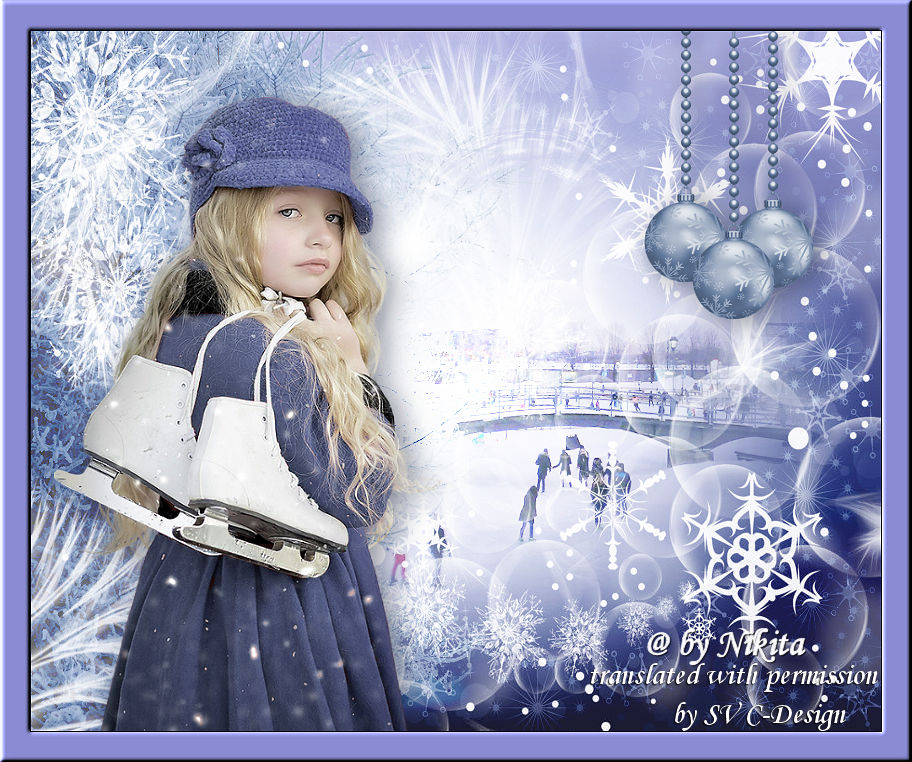
1.
Open a new transparent image of 850 x 700 pixels.
Foreground color # cdceef at
Background color # 5c6489
******************************************************************
2.
Make one gradient with these settings
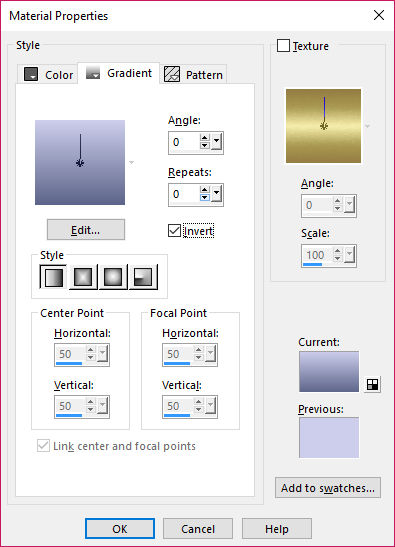
fill with gradient
******************************************************************
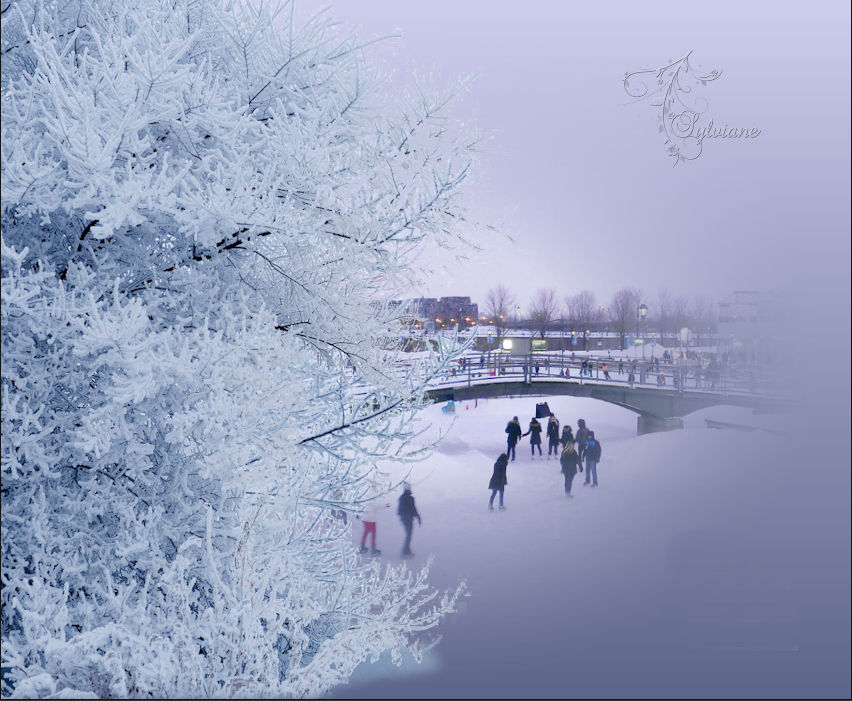
3.
Open paysage-nkt.png
Edit – Copy
Edit - Paste as new layer
Layers - Duplicate
******************************************************************
4.
Open branches-nkt.png
Edit – Copy
Edit - Paste as new layer
place the tree on the left-hand edge back on your drawing, to about half of the tree remains
******************************************************************
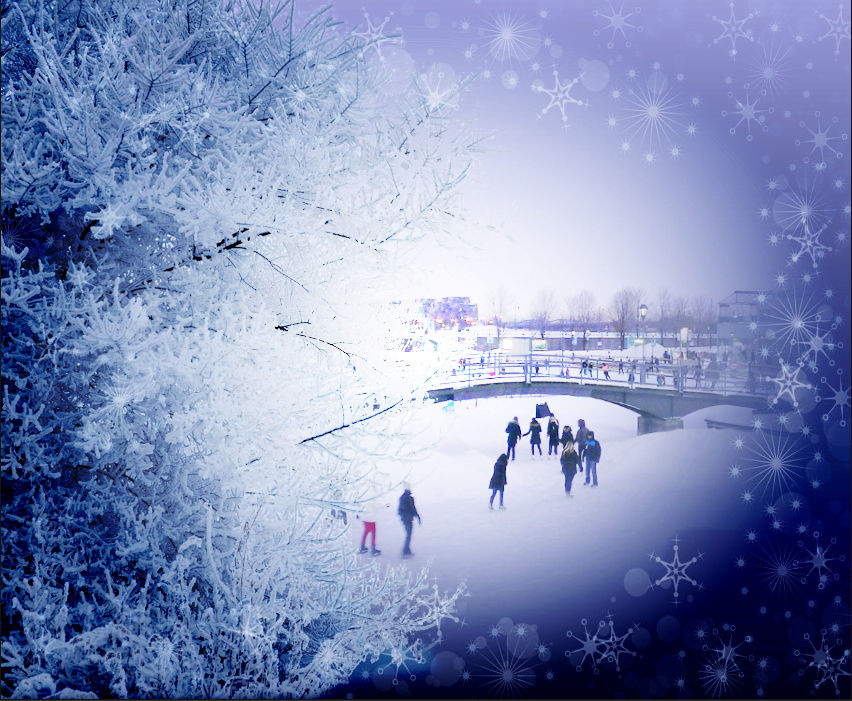
5.
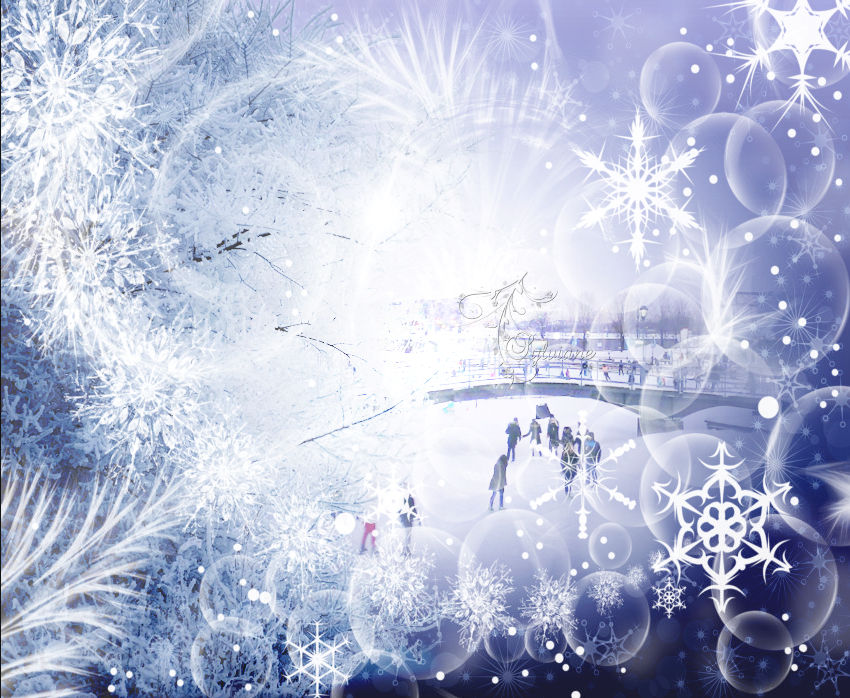
Open fond1.jpg
Edit – Copy
Edit - Paste as new layer
it is good, do not change
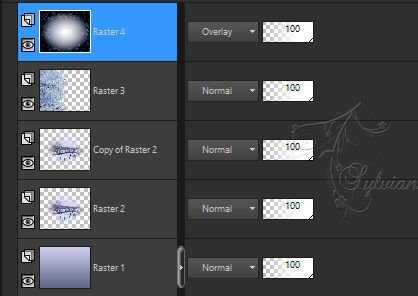
Put your Blend mode: Overlay
Layers palette:
******************************************************************
6.
Open fond2.jpg
Edit – Copy
Edit - Paste as new layer
it is good, do not change
Put your Blend mode: Screen
******************************************************************
7.
Open fond3.jpg
Edit – Copy
Edit - Paste as new layer
it is good, do not change
Put your Blend mode: Screen
Layers palette:
******************************************************************
8.
Open enfant_nkt.png
Edit – Copy
Edit - Paste as new layer
place the tube on the left side of your image
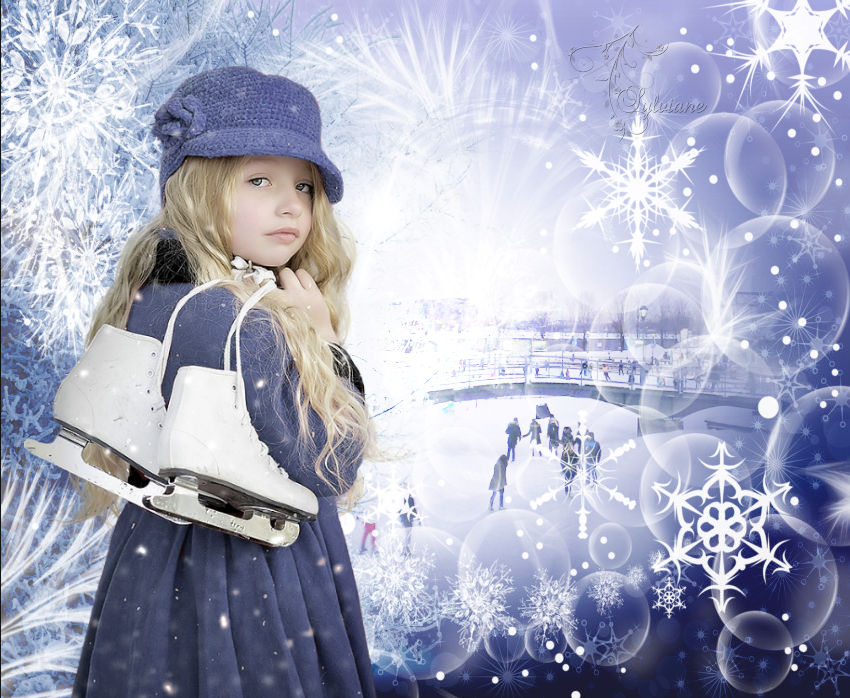
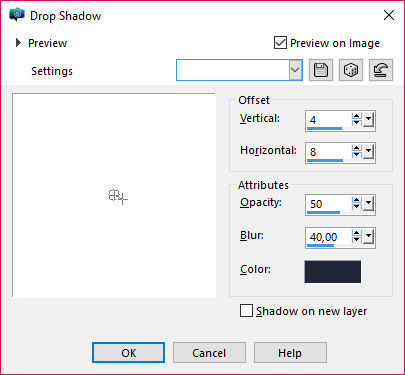
Effects - 3D effects - Drop shadow
4/8/50/40 color: #22263A
******************************************************************
9.
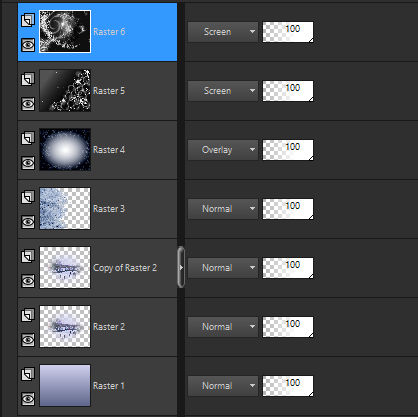
Open boule-nkt.png
Edit – Copy
Edit - Paste as new layer
Place it at the top on the right and duplicate it as many times as you wish. I did it 3 times by changing the size of each of them.
Adjust - Sharpness – Sharpen every bal
Layers - Arrange - Move Down
Edit – Repeat move layer down
Effects - 3D effects - Drop shadow
4/8/50/40 color: #22263A
******************************************************************
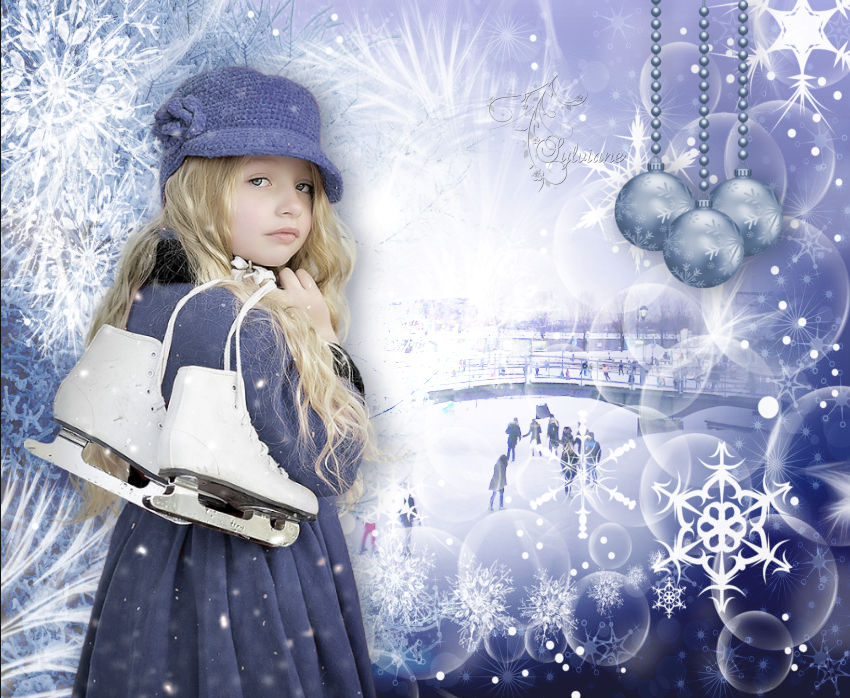
10.
Layers - Merge - Merge all
Image - Add Borders - 1 pixel - color:# 1b1b33.
******************************************************************
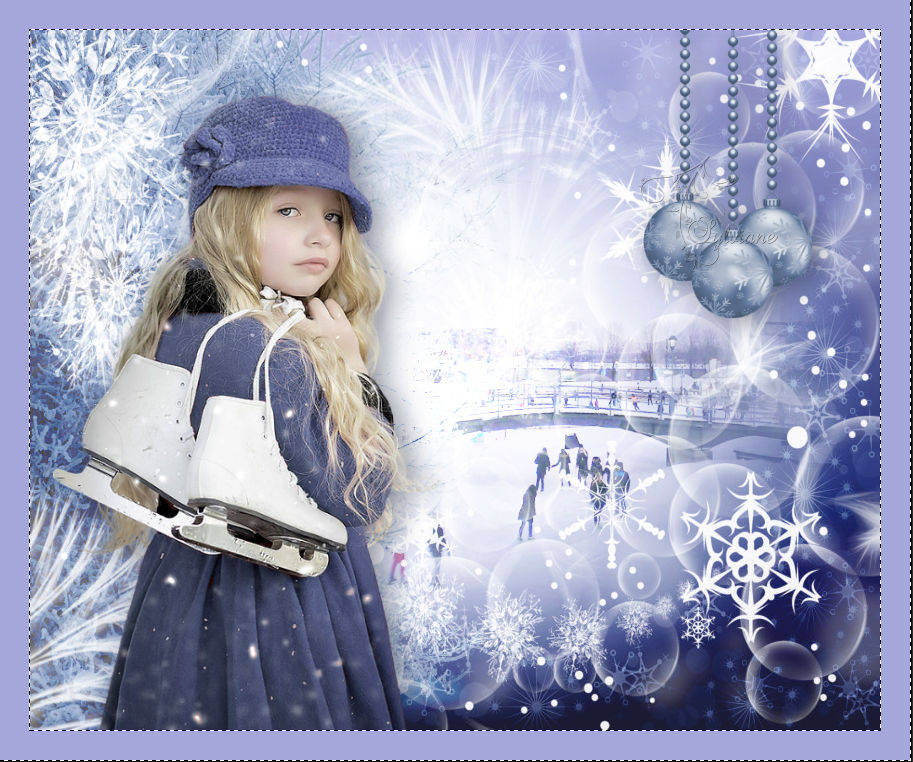
11.
Image - Add Borders - 30 pixels - color:# a5a6d9.
Activate magic wand
Select the edge of 30 pixels as shown below here
******************************************************************
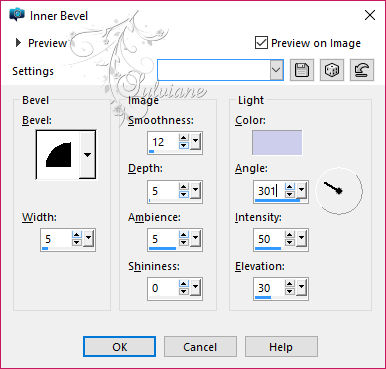
12.
Effects - 3D effects - Inner Bevel
Selection - Select None
put your watermark
Image - Resize - 900 pixels.
Adjust - Sharpness – Sharpen
save as jpeg
Back
Copyright Translation © 2017 by SvC-Design
